ARCH 655 PROJECT_02
ARCH 655 PROJECT_02
Experiment with the building's roof and skin of Project 1Tahmina Khanom
Instructor: Dr. Wei Yan
Spring 2024, TAMU
In the initial project, I utilized the lunchbox plugins to create the exterior facade. For my subsequent project, I am exploring various techniques to design different patterns on the roof and surface, including Voronoi, GHPython Script, and Chatgpt. I created the surfaces through Rhino and Grasshopper.
Additionally, I am now employing generative AI to further experiment with and enhance the designs from the first project.
Skin Pattern using Voronoi and Morph surface
The first step involves creating a rectangular surface and then applying Pop2D and Voronoi commands to generate random cells within it. The number of cells can be adjusted using the count parameter of the Pop2D command. In the second step, I use the area and scale component to get the center point. then, I used the boundary surface component and flattened that to get the pattern .then for extruded that in the z-direction with a number slider so that I could change it.
After that, I connect the extruded geometry to the surface morph component with a boundary box for reference, and then I connect the building surface with the surface morph with the deconstruct domain. Lastly, to get the pattern at the building surface, an extrusion factor is added to morph the surface input.
Fig: Grasshopper map
First step: creating a rectangular surface for the Voronoi pattern
Fig: Voronoi pattern was created using the Morph surface and Voronoi in Grasshopper.
Using AI to render
I also use AI to render the generated model, and for this render, I used PromeAi.pro website.
Here, we can choose how much change we want; we can provide reference images and edit
that.
Skin Pattern using Voronoi 3D
This is another method to make a skin pattern on the surface separately using a volumetric Voronoi 3D component. I mainly use populate geometry, Voronoi 3D, Surface closest point, evaluate surface, Endpoints, and 4-point surface. Firstly, I simplify the loft surface by re-parametrizing and adding Populate Geometry (PopGeo). This Populate Geometry scatter points across the surface, and the number of points is determined by the count slider, which affects the density of the Voronoi cells. After that, I added the Voronoi 3D component, which will generate Voronoi cells as well, and I used Boundary Surfaces, which will be exploded by the explode component. Lastly, I used the move component and input it with a 4-point surface component.
Fig: Created Voronoi skin pattern using Voronoi 3D in Grasshopper
Fig: Process of creating Voronoi skin pattern using Voronoi 3D in Grasshopper
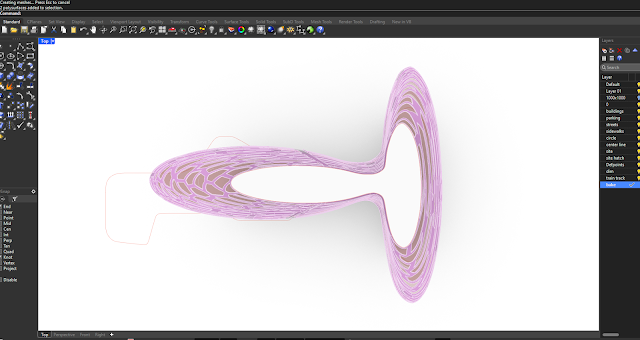
Fig: Voronoi skin pattern using Voronoi 3D in Grasshopper
Fig: Voronoi skin pattern rendered in Rhino with glass material
Skin Pattern using ChatGpt generated script on GHPython.
I wanted to create a perforated pattern connecting Chatgpt with the grasshopper python. So I wrote whatever I wanted to make, and my first prompt was, “Could you please create a circle pattern with different radius in GHPython script for a selected surface in a rhino environment.”
After that, I used the Editpythonscript command in Rhino to run the code. The first time, it showed an error in a line of that code. So again, I asked Chatgpt,” This line is not working in grasshopper python: error line,” and provided another version of the code.
After that, I wrote a ChatGpt that said, ‘’How to Use This Script in Grasshopper,’’ and it gave me the instructions step by step. Surprisingly, it debugged the error, and the code worked. However, there were still some limitations, so Chatgpt could not perform the perforation. Then, I had to do that using the rhino command ‘ trim’ to get the skin pattern within the surface of the building roof.
Fig: The circles on the surface after running the Python code
Fig: The circle's perforation from the surface with the rhino command ‘trim.’
Skin Pattern using ChatGpt generated script on GHPython.
I also asked ChatGpt to create a GHPython for the diamond pattern surface so that I could perforate it. It generated code, which I ran in GHPython. I had to modify some parameters and needed to input parameters. To dynamically control these Parameters, I replaced the example values of num_array, num_line, array_distance, length_factor, start_dom, end_dom, init_x, and init_y with Grassshopper components like sliders or panels. After that I copy this script into a Grasshopper Python script component. Connect a curve component to the output of the Python script component to visualize the lines in Grasshopper.
Fig: Input parameters in GHPython
Fig: Chatgpt generated code and modified
I created this surface almost similar to the previous one. After running the code, the lines created the form on the surface, but it did not cover the whole surface and after that, I trimmed it in Rhino to get the perforation.
.
Using AI to generate screen pattern
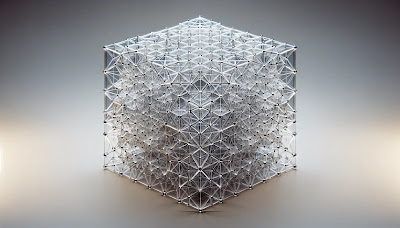
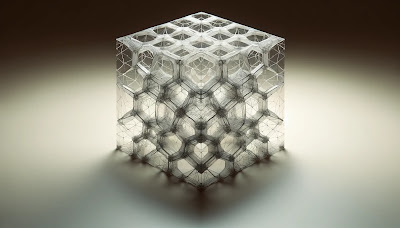
I also tried to generate some patterns using DALL-E by providing a created model with the Voronoi pattern in Grasshopper as a reference.
The prompt was to ''Create a 3D voronoi-patterned structure with a glass material.''
Fig: AI-generated image
Project Video


Comments
Post a Comment